First-Time Home Golf Simulator Buyer’s Checklist: 7 Mistakes That Cost $1,000+ (2026 Edition)
Building a home golf simulator in 2026 is infinitely more accessible than it was a few years ago. The days of needing $20,000 to get accurate spin numbers are over. But while the barrier to entry has plummeted, the complexity of the ecosystem has skyrocketed.
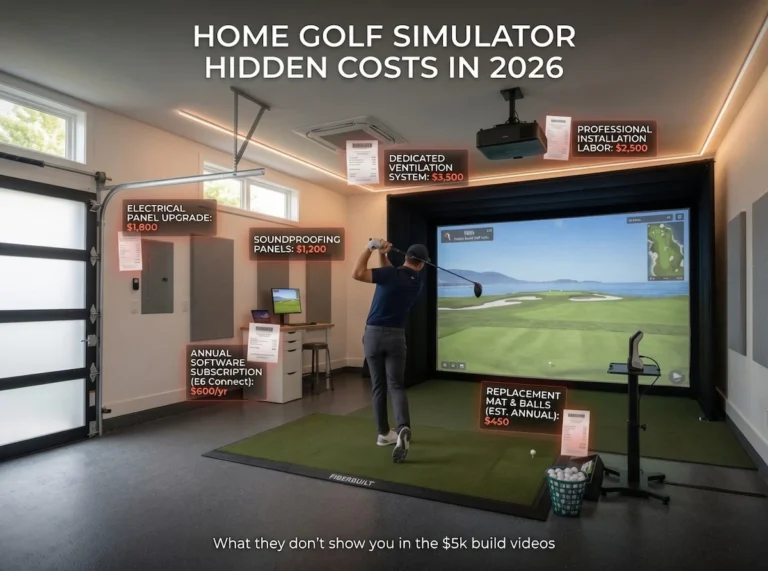
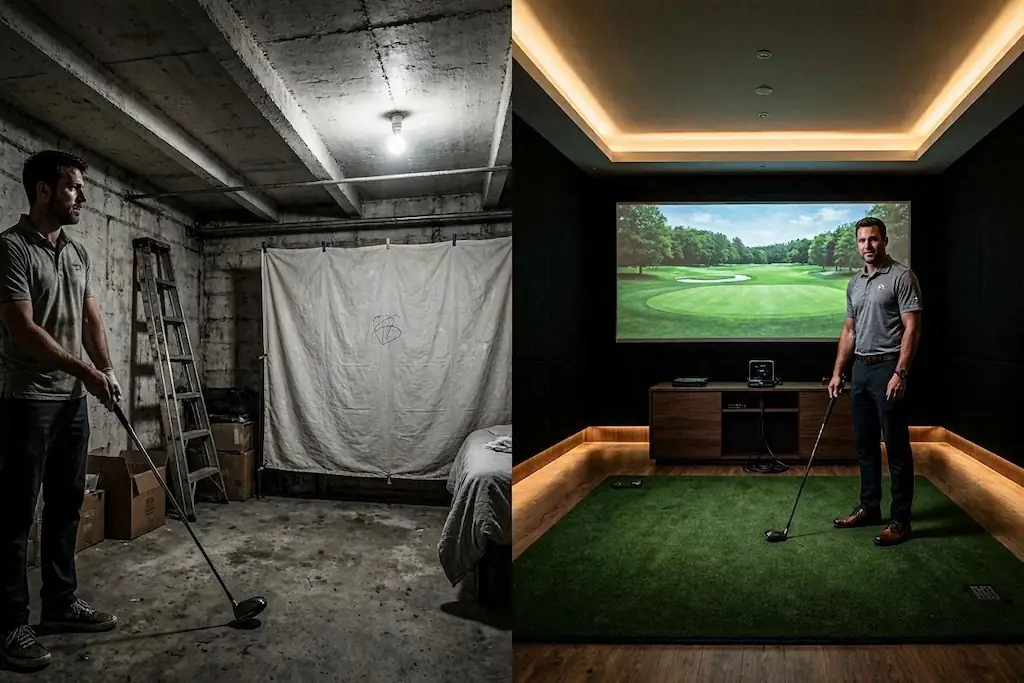
If this is your first time building a simulator, your biggest risk isn’t buying the wrong launch monitor—it’s severely miscalculating the hidden costs of the room itself. A simulator is an ecosystem where the launch monitor, projector, screen, enclosure, and mat must all play nicely together. Get one wrong, and you’ve wasted thousands of dollars on a room you hate using.
Before you buy a single piece of hardware, read this checklist. Here are the most expensive mistakes first-time buyers make, and how to avoid them.
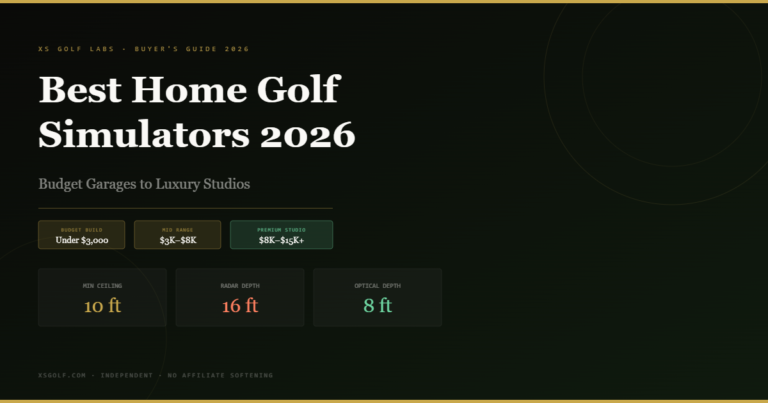
1. Guessing Your Space (The 10-10-16 Rule)
The number one reason home simulators fail is spatial constraints. First-time buyers often assume an 8.5 or 9-foot ceiling is “good enough.” It is not. While you might be able to physically clear the ceiling with a mid-iron, a low ceiling creates “indoor swing syndrome”—a psychological restriction where you subconsciously alter your mechanics to avoid hitting the drywall.
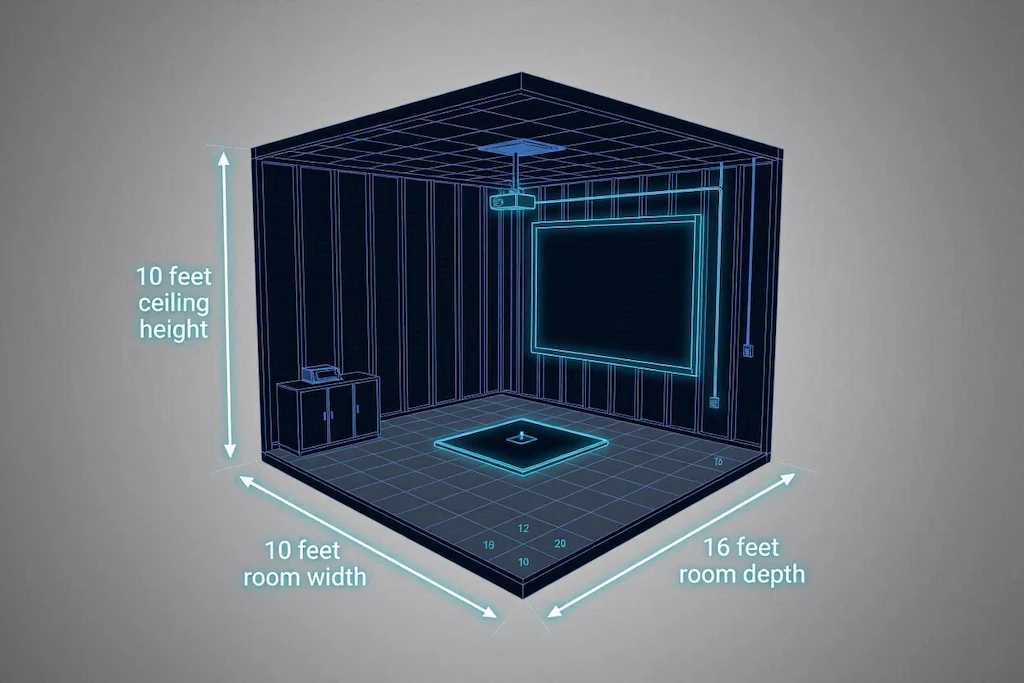
The golden rule of simulator blueprints is 10-10-16:
- 10-Foot Ceiling: The absolute minimum for uninhibited, aggressive driver swings. Watch out for garage door tracks or overhead lighting fixtures that drop down into this space.
- 10-Foot Width: To comfortably center the ball and swing without hitting the side enclosures.
- 16-Foot Depth: You need roughly 8 feet from the ball to the screen, and 8 feet behind the ball for your backswing and launch monitor placement.
2. Buying Radar Technology for a Tight Indoor Space
If you are constrained on depth, the type of launch monitor you buy matters immensely. Golfers often buy highly-rated radar units (like the Garmin Approach R10, FlightScope Mevo+ Gen 2, or Rapsodo MLM2PRO) for small indoor spaces and are shocked when the driver spin data is terrible.
- Radar Launch Monitors: Doppler radar units sit behind the golfer and require the ball to fly a physical distance to calculate spin and speed. They generally require 16 to 20 feet of total room depth. If you use them indoors, you must use specially marked metallic balls (like Titleist RCT or RPT balls) to get accurate spin numbers.
- Optical/Camera Launch Monitors: Systems like the Square Golf ($699), SkyTrak+ ($1,795), or Bushnell Launch Pro ($2,499) use high-speed cameras sitting directly parallel to the golf ball. They require almost zero depth behind the golfer and don’t need the ball to fly to read it, making them vastly superior for tight indoor setups.
3. The “Cheap Mat” Joint Injury Trap
Do not spend $2,500 on a launch monitor and $100 on a cheap, thin stance mat. Hitting down and through the ball on concrete-backed artificial turf will quickly result in severe elbow and wrist tendinitis.
The Hack: You don’t need to spend $1,000 on a premium turf system, either. Buy a cheap 5×4 stance mat, cut a 1×2 foot rectangle out of the center, and insert a premium, high-quality hitting strip (like a thick nylon insert or one from USA Turf Pros). This gives you an injury-preventing strike zone at a fraction of the cost.
4. Ignoring the True “Cost Stack”
A true budget must evaluate the entire ecosystem, not just the launch monitor. First-time buyers constantly forget the computing power required to run simulation software.
If you want to run GSPro—the undisputed gold standard of 2026 simulation software with over 1,500 user-designed courses—you need a dedicated gaming PC with a dedicated graphics card (like an RTX 4070). Do not buy a gaming laptop; they overheat under the load of 4K rendering and have significantly shorter lifespans. Shop the used market for a gaming desktop instead to save hundreds of dollars.
5. Blindness to Subscription Fees
Launch monitor manufacturers have largely moved to subscription models. A “cheap” monitor can become the most expensive option in the room over a three-year period.
- The Rapsodo MLM2PRO ($699) requires a $199/year subscription or a $600 lifetime unlock to access its premium simulation features.
- The Bushnell Launch Pro requires a $199/year (Silver) or $499/year (Gold) subscription for third-party software integration.
- If you despise recurring fees, the optical Square Golf ($699) or the upcoming four-camera Square Omni ($1,599) operate on a pay-as-you-play credit system with zero forced annual subscriptions.
6. Skimping on the Impact Screen
Impact screens are where cheap setups go to die. Budget screens bought off Amazon are dangerously loud (sounding like a gunshot at impact), have severe bounce-back risks, and lack image clarity.
Do yourself a favor and invest in a triple-layer, sound-reducing 3D mesh impact screen. They absorb the ball like a pillow, drastically reducing the noise that will otherwise drive your family crazy.
7. When You Should Just Skip the Purchase
If your ceiling is 8.5 feet and you don’t have the budget to excavate your basement or lift your garage rafters, do not force a simulator build.
Instead, buy a high-quality outdoor net (like The Net Return) and a portable launch monitor (like the Shot Scope LM1 for $199) to use on the patio or the driving range. Alternatively, leverage the massive boom in premium commercial simulator facilities like Five Iron Golf or X-Golf, which offer TrackMan and proprietary setups for $35–$80 an hour, letting you use top-tier tech without the $15,000 infrastructure investment.
Ready to start building? Check out our complete guide on how to build the ultimate garage golf simulator under $5,000.