How to Install a Golf Simulator: Step-by-Step Guide 2026
Last updated: September 18, 2026
A complete golf simulator installation takes 7–8 hours for two people with the right preparation. Most problems — a projector in the wrong position, a frame that does not clear the ceiling, an impact screen that sags — come from skipping the checklist above. Do the pre-work and build day is straightforward.
This guide covers a Carl’s Place 10×10 enclosure with a SkyTrak MAX launch monitor and BenQ short-throw projector — the setup in our $5,000 garage simulator build guide. The principles apply to any enclosed simulator system.
Step 1: Room preparation (1 hour)
Clear the room completely. Mark the enclosure footprint on the floor with masking tape — 10×10 feet, centred in the available width with at least 1 foot clearance on each side. Mark the ceiling projector mount point: dead centre of the enclosure width, 8–9 feet from the screen wall. Confirm your ceiling joist runs across that point (use a stud finder). If not, you will need a ceiling mounting plate that bridges two joists.
Lay plywood sheet (12mm, 6×4 foot) in the hitting position beneath where the mat will sit. This distributes mat weight, protects the floor, and provides a stable base that prevents mat creep during use. This step takes 10 minutes and prevents several annoying problems.
Step 2: Electrical setup (1 hour)
A dedicated 20-amp circuit is strongly recommended. Running a projector, launch monitor, PC/iPad charger, and lighting on a shared domestic circuit risks nuisance trips and, more critically, power fluctuations that affect launch monitor accuracy in some devices. If you cannot run a dedicated circuit, use a quality surge protector with voltage regulation — not a basic power strip.
Route the circuit to a double socket positioned on the side wall at waist height, clear of the enclosure frame. A second socket near the projector mount point (ceiling or high wall) eliminates the cable run along the floor that every installer eventually regrets not doing.
Step 3: Projector mount (45 minutes)
The BenQ TH685P short-throw projector mounts 4–5 feet from the screen at ceiling height. Use a ceiling projector mount rated for at least 10kg — the projector weighs 3.5kg but you want margin. Locate the ceiling joist, drill pilot holes, and secure the mount plate. Adjust the tilt until the image fills the screen edge to edge before the enclosure frame goes up — it is much harder to adjust after.
Run the HDMI cable from the mount point to the laptop/PC position along the ceiling and down the wall inside conduit. A 5-metre HDMI cable is sufficient for most rooms — longer runs (8m+) require an active HDMI cable or HDMI extender.
Step 4: Enclosure frame assembly (2 hours)
The Carl’s Place DIY frame is the longest step and benefits most from a second pair of hands. The steel tubes connect via internal couplings — lay all components out in order before starting assembly. The frame sequence is: four base corners → base tubes → uprights → top frame → cross-bracing. Finger-tighten all connections before final tightening so you can adjust alignment.
Confirm the frame is square before tightening: measure diagonally from corner to corner — both measurements should be identical within 10mm. A frame that is not square will prevent the screen from sitting flat and cause the side barriers to gap at the corners.
Anchor the base frame to the floor with furniture feet or carpet grippers — not permanently, but enough to prevent movement during use. A frame that shifts under impact will misalign the screen and, over time, stress the tube connections.
Step 5: Impact screen installation (45 minutes)
The Carl’s Place impact screen attaches via a bungee cord system around the perimeter of the screen frame. Start from the centre of the top edge and work outward, then the bottom, then the sides. Do not over-tension — the screen should have slight bow toward the room (convex) to absorb ball impact without the ball contacting the rear frame.
Check the projector image alignment with the screen lit and the room dark before attaching the side barriers. Adjust keystone correction in the projector settings until the image is perfectly rectangular. The BenQ TH685P has a vertical keystone range of ±30° — more than sufficient for any ceiling angle.
Step 6: Hitting mat and launch monitor position (20 minutes)
Position the Fiberbuilt 5×5 mat over the plywood sheet, centred in the enclosure width. The hitting position — ball position at address — should be 8–10 feet from the screen. Closer than 8 feet and the ball may not clear the launch monitor sensor before impact; further than 10 feet and you are wasting enclosure depth.
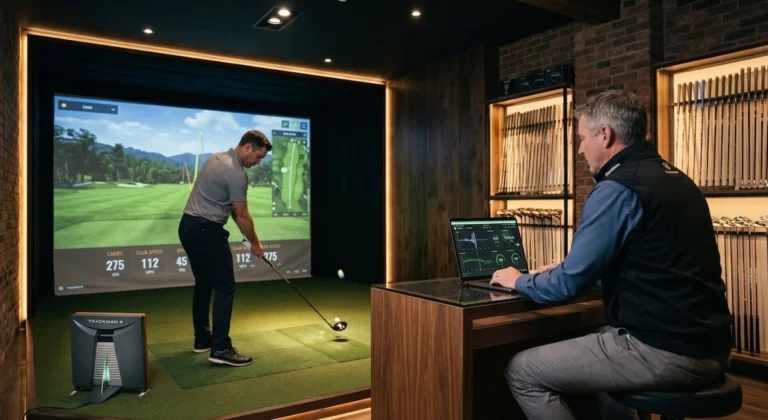
The SkyTrak MAX sits 12–18 inches to the right of the ball position (for right-handed golfers), at the same level as the ball. Level it precisely — the device has internal levelling sensors and will indicate if placement is off. An unlevel device introduces systematic error into all measurements.
Step 7: Launch monitor calibration (30 minutes)
Open the SkyTrak app and connect to the device via WiFi (the MAX creates its own network). Hit 20 shots at 60–70% effort to let the device warm up — the first few readings after a cold start are less accurate than subsequent shots. Compare carry distances to your known outdoor distances: a well-calibrated setup should be within 3–5 yards consistently.
If readings are consistently high or low, check the mat height relative to the launch monitor. The device measures from its lens height — a thicker mat than the calibration default will shift carry readings up. The SkyTrak MAX app has a mat height adjustment in the settings menu.
Step 8: Software setup (45 minutes)
Download your chosen course software on the laptop connected to the projector. Our recommendation for the SkyTrak MAX is E6 Connect — it has the best course library, the most reliable SkyTrak integration, and the easiest initial setup. Log in, select a course, and confirm the shot data is displaying correctly before your first full session.
For the full software comparison — including GSPro, TGC 2019, and Foresight FSX — see our golf simulator software guide 2026.
Common installation mistakes — and how to avoid them
Projector too close to the screen. Short-throw projectors have a minimum throw distance. The BenQ TH685P requires at least 4 feet from the lens to a 100-inch screen. Closer than this and the image will not fill the screen — check the throw ratio calculator on BenQ’s website before mounting.
Launch monitor WiFi interference. The SkyTrak MAX uses 5GHz WiFi. Thick concrete walls and metal enclosure frames can weaken the signal. If the device disconnects frequently, use a WiFi extender placed inside the enclosure — a small TP-Link unit works reliably at this range.
Screen tension too high. An over-tensioned screen bounces the ball back toward the player. The correct tension allows the screen to absorb approximately 6 inches of deflection on a driver impact. If the ball is consistently returning more than 10 feet, loosen the bungee cords uniformly.
Mat too far from the screen. Many first-time builders position the mat too conservatively — 12+ feet from the screen. This leaves dead space in the enclosure and makes the launch monitor position awkward. The optimal hitting position is 8–10 feet from screen.
Planning your build?
If you are still deciding on equipment, start with the best indoor golf simulators 2026 guide — every complete system compared with real accuracy data. For room design ideas across different space types and budgets, see our golf simulator room ideas guide. Current verified pricing for all components is in our golf simulator deals page, updated weekly.
Some links on XS Golf are affiliate links. See our affiliate disclosure.