Best Garage Golf Simulator 2026 Under $5,000: The No-BS Build Guide
Building a home golf simulator in your garage used to mean hitting into a cheap bedsheet with a toy launch monitor that guessed your spin rates. In 2026, the landscape has completely changed. You can now build a highly accurate, fully immersive simulator setup for under $5,000. The secret isn’t buying a cheap launch monitor—it’s refusing to pay the “golf tax” on the surrounding materials. If you know where to save (enclosures, flooring) and where to spend (the launch monitor and hitting strip), you can get Tour-level data and 4K capability on a serious budget. Here is exactly how to build the ultimate $3,000–$5,000 garage simulator in 2026, piece by piece. Once your build is complete, review the true 3-year TCO of home golf simulators so you know exactly what subscriptions and maintenance will cost going forward.
Related: Once your bay is built, use it to prep for a club fitting — see our Golf Club Fitting Guide for Intermediate Golfers (8–18 Handicap).
1. The Brains: The Launch Monitor ($699 – $1,499)
Your launch monitor is the engine of the simulator. For a garage build, your biggest enemy is often space. You need a launch monitor that fits your room depth and doesn’t trap you in a cycle of expensive subscription fees.
The Space-Saver: Square Golf ($699)
If you still want to park a car in your garage, optical (camera-based) monitors are king because they sit parallel to the ball, requiring almost zero depth. The Square Golf is a pure camera-based unit that delivers incredibly accurate data with lightning-fast shot delay. The best part? No forced $200/year subscriptions. It uses a cheap pay-as-you-play credit system for its native software and integrates freely with GSPro.
The Indoor/Outdoor Hybrid: Rapsodo MLM2PRO ($699)
If you have at least 15 feet of total depth in your garage and want to take your monitor to the driving range, the MLM2PRO is the best sub-$1k hybrid. It uses a mix of radar and dual cameras. Just remember that indoors, you must use their specific Titleist RPT balls to get accurate spin numbers.
The Premium Upgrade: Bushnell Circle B Edition LPi ($1,499)
If you want professional, GC3-level accuracy and have room in the budget, Bushnell recently released the LPi—a stripped-down, indoor-only version of the Launch Pro without a built-in screen. It is the most accurate device you can buy under $2,000.
2. The Flooring & Mat Hack ($150 – $200)
Do not spend $1,000 on a premium turf system. It is a waste of your budget. Instead, build your own modular floor. Buy cheap EVVA foam puzzle gym mats to cover your garage floor, and top them with an 85-cent-per-square-foot outdoor rug or turf from a hardware store. This looks incredibly clean and doubles as a putting surface.
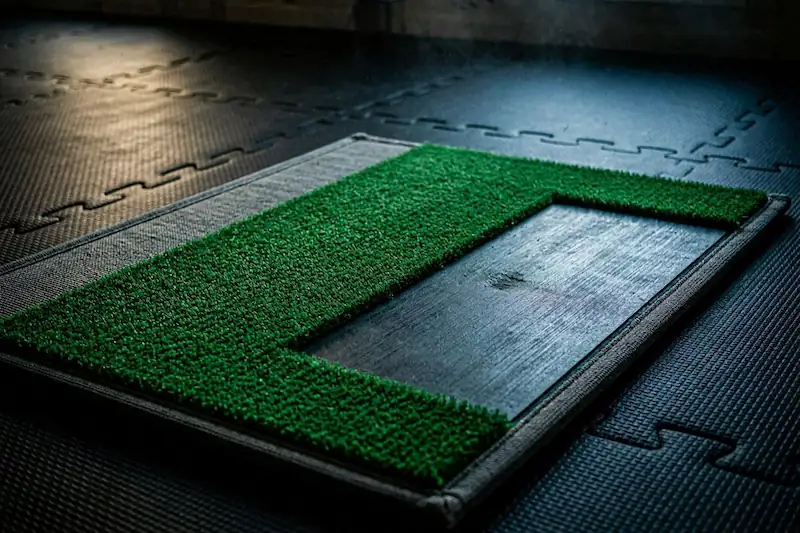
For the hitting area, buy a cheap 5×4 stance mat. Do not hit directly off cheap mats—they will destroy your elbows and wrists. Instead, cut a 1×2 foot rectangle out of the center and insert a high-quality hitting strip (like a $16 strip from USA Turf Pros or a thick nylon insert). This gives you a premium, injury-preventing strike zone at a fraction of the cost.
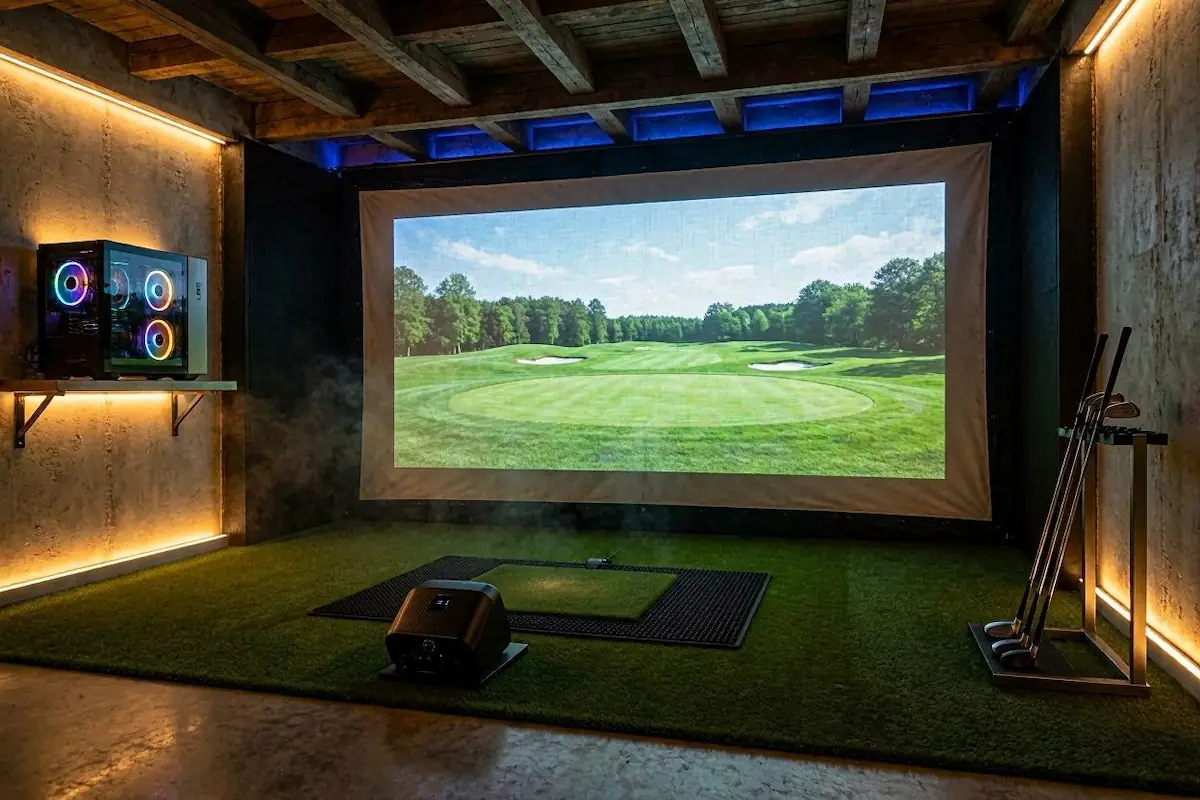
3. The Enclosure & Impact Screen ($150 – $200)
Packaged simulator enclosures with EMT pipe frames easily cost over $1,000. Since you are in a garage, use your walls. You can anchor a triple-layer, sound-reducing 3D mesh impact screen directly to your garage walls or ceiling using simple eyelets and plastic anchors. These screens can be found online for under $100, and they absorb ball impacts like a pillow, keeping the noise down. To protect your walls from errant shots, build a DIY “shank wall” extending a few feet out from the screen. Hang cheap blackout curtains over one-inch foam tiles attached to cardboard. It will catch any shanked ball with zero damage.
Note: If you absolutely must retract your setup to park the car, look into systems like the G-TRAK retractable screen that mounts to your garage door tracks. It will push your budget higher, but it solves the dual-purpose garage problem.
4. Software & Computing ($750 – $1,200)
To get the most out of your simulator, you want to run GSPro—the undisputed gold standard of simulation software featuring over 1,500 community-built courses and hyper-realistic ball physics for $250 a year. Running GSPro requires a gaming PC. Do not buy a gaming laptop; they overheat and have shorter lifespans. Shop on Facebook Marketplace or eBay for a used gaming desktop (around $500) with a dedicated graphics card capable of handling 1080p resolution.
5. The Projector ($500)
For a sub-$5,000 build, a high-quality 1080p short-throw projector is your best bet. Short-throw projectors sit closer to the screen, meaning your body won’t cast a shadow on the image when you swing. Once you are ready to upgrade, you can swap it out for a 4K laser projector (like the BenQ TK700STi) to get that ultra-immersive, billion-color depth, but a standard 1080p gaming projector is plenty to start.
The Anti-DIY Alternative: Carl’s Place R10 Bundle ($3,000+)
If sourcing foam tiles and cutting stance mats sounds miserable, there is one pre-packaged bundle worth your money. The Carl’s Place Ready-to-Golf Garmin R10 Bundle includes a customized DIY enclosure, a premium cabled impact screen, a mat, a projector, and the Garmin R10 launch monitor—all in one shipment. It requires about 14 feet of garage depth and takes two hours to assemble, making it the best turnkey entry point on the market.