Best Home Golf Simulators 2026: From Budget Garages to Luxury Studios
The golf simulator market in 2026 is bigger, better, and more confusing than it’s ever been. Overhead camera systems that cost $20,000 five years ago are now under $2,000. Subscription-free optical monitors are genuinely accurate. And there are more ways to waste money on a bad setup than ever before.
This guide cuts through it. We cover the complete ecosystem — launch monitor, impact screen, enclosure, projector, software, and the hidden costs nobody puts in the headline price. Whether you’re converting a garage or building a dedicated studio, here’s what actually works in 2026.
If you are starting from scratch and need a full technical walkthrough — room dimensions, launch monitor decision framework, budget tiers, projector throw ratios, PC specs, and software — read the dedicated Golf Simulator Setup Guide.
Quick Verdict
There is no single best home golf simulator in 2026
The right choice is decided by two things before any spec sheet matters: your room depth and your three-year total cost of ownership.
- Tight spaces (10–13 ft of depth): go optical. Square Golf ($699) is the cheapest credible route; a full Square Golf + SIG10 + BenQ + GSPro build lands around $3,950 over three years.
- Best long-term value: a DIY build around the Garmin R10 with a Carl’s Place enclosure and GSPro comes to roughly $3,150 over three years — the lowest genuinely complete setup here.
- Best self-contained experience: Garmin R50. Built-in screen, no gaming PC required for many courses, and no simulator subscription; a full R50 studio runs about $5,800 over three years.
- Premium overhead (10 ft+ ceilings): Uneekor EYE XO2 or Foresight Falcon. Nothing on the floor, no depth problem, highest accuracy — and $8,000–$15,000 for a complete build.
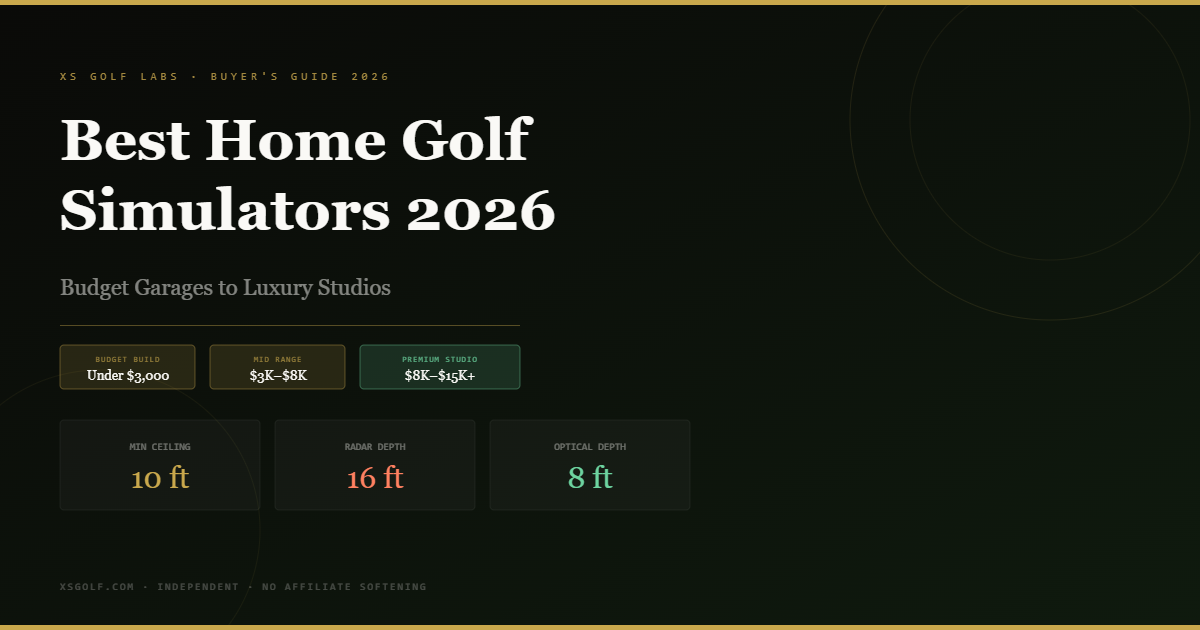
Measure your room first — ceiling height minimum is 10 ft, and depth decides radar versus optical. Technology second. Everything else follows.
The 2026 Simulator Landscape: The Space Rule Comes First
Before you spend a dollar, measure your room. This is the most important thing in this guide. A $5,000 launch monitor in a room that’s too small is worse than a $700 device in the right space.
The ceiling minimum is 10 feet. Not 9. Not 9’6″. Ten feet for a comfortable driver swing. Taller players need more. If your ceiling is under 10 feet, you’re either chipping practice or building a putting setup — not a full simulator.
Room depth depends entirely on your launch monitor technology. This is the split that defines the whole market:
The Space Rule — Radar vs. Optical Radar Systems MEVO+ · GARMIN R10/R50 · SC4 Sit behind the ball ~16 ft total depth Ball flight needed to calculate spin Spin degrades in short indoor bays RPT/RCT balls may be required indoors Optical / Camera Systems SQUARE GOLF · SKYTRAK+ · FORESIGHT GC3 Sit beside or in front of ball 8–10 ft total depth Captures impact event directly Accurate spin in any room depth Any premium ball works fine xsgolf.comIf your space is 14 feet or deeper, you can run radar without compromise. If it’s 10–13 feet, optical is the correct choice. And if you’re working with an 8-foot garage bay? You need a specific setup — we cover that in the small spaces section below. For a full room depth breakdown with diagrams, see our simulator build guide.
Best Overall: Premium Simulator Setups
Garmin R50 — The New Standard for Self-Contained Simulators
The R50 is what happens when Garmin takes the R10 concept seriously. It ships with a built-in 10-inch touchscreen that runs full simulator courses without a separate PC, projector, or software subscription — point it at a net and you’re playing. The camera array captures club path, face angle, attack angle, ball speed, spin rate, and carry with a level of accuracy that approaches commercial systems costing 3× as much.
For a dedicated studio build, pair the R50 with a 10×10 SIG10 enclosure and a BenQ 4K short-throw projector. That combination — monitor, enclosure, projector — runs approximately $4,500–$5,500 installed and delivers a studio-quality experience that will hold its value as the ecosystem matures.
Foresight Falcon / Uneekor EYE XO2 — Commercial Grade, Home Price
Overhead camera systems mounted to the ceiling above the hitting area represent the best technology in simulation: no tripod to trip over, no device to step around, no position adjustments between left and right-handed players. The Foresight Falcon and Uneekor EYE XO2 are the two overhead units worth owning at the serious amateur level.
Both systems pair naturally with large enclosures — the SIG12 (12-foot wide, for rooms that can accommodate it) gives you commercial-studio dimensions at home. Budget $8,000–$15,000 for a complete overhead build with quality enclosure and projector. The ceiling mount eliminates the space depth problem entirely: the system sees impact from above, not behind.
One important caveat: overhead systems require a ceiling height of at least 9’6″ for mounting clearance, with 10’+ preferred. If your room doesn’t meet that, wall-mounted or floor-based optical units are the alternative.
Best Value: Subscription-Free Setups That Don’t Compromise Accuracy
Square Golf ($699) and Square Omni ($1,599) — The Value Story of 2026
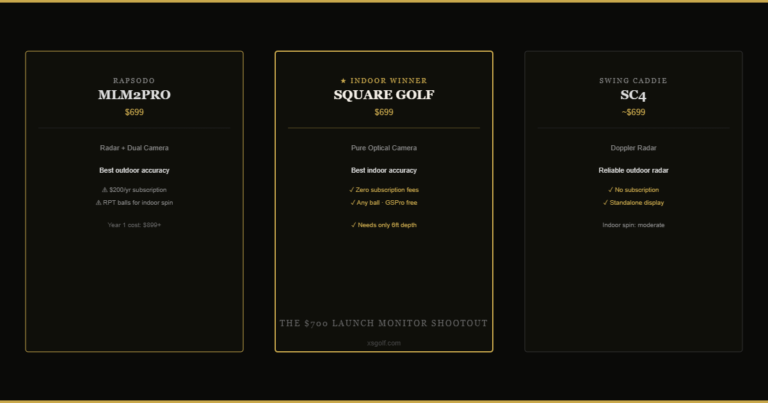
Square Golf has done something genuinely disruptive: brought optical camera accuracy to $699 with zero subscription fees. Their credit system for native course access is pay-as-you-play, and the device connects freely to GSPro and E6 with no additional subscription. Over three years, a subscribed Rapsodo MLM2PRO user will spend more than two Square Golf units.
The Square Omni at $1,599 extends that to outdoor use — a first for consumer optical systems at this price point. If you want the accuracy of camera technology that works both on the range and in your simulator bay, the Omni is the most significant product launch in this bracket since the original SkyTrak.
Neither device requires special balls. Neither requires a subscription to access its best features. Neither needs 16 feet of room depth. They are the clearest value proposition in the 2026 simulator market for budget-conscious serious golfers. For a detailed look at how they stack up against radar alternatives, see our launch monitors under $1,000 guide.
SkyTrak+ — The Proven Optical Workhorse
SkyTrak’s camera-based system has been the benchmark for value optical accuracy since 2015. The SkyTrak+ updates that formula with better club data and expanded software integration. It still requires a subscription for full feature access ($199/yr for the Game Improvement Plan, $299/yr for Play and Improve), but the underlying accuracy is well-established and trusted by club fitters worldwide. Our full review at SkyTrak Max Review covers the latest iteration in detail, and if you’re cross-shopping at the premium tier, our Trackman vs. SkyTrak Max comparison is required reading before committing. If you’re choosing between the SkyTrak+ and the new ST MAX, our SkyTrak+ vs. SkyTrak ST MAX comparison breaks down whether the $1,200 price gap is actually worth it.
Best for Garages and Small Spaces
The garage simulator is the most common build in 2026, and the most commonly botched. Standard two-car garage bays run 18–20 feet deep, which sounds fine until you add the car, the workbench, and the enclosure footprint. Most people end up with 12–14 feet of actual hitting depth — which means radar is marginal and optical is correct.
Garage Simulator — The Right Setup COMPONENT RECOMMENDATION APPROX. COST Launch MonitorSkyTrak+ or Square Golf$699–$1,495 EnclosureSIG8 or retractable G-TRAK$800–$1,600 ProjectorBenQ TH671ST short-throw$700–$900 SoftwareGSPro (PC required)$250/yr xsgolf.comThe retractable screen approach is the best solution for dual-use garages. The G-TRAK system mounts to the ceiling and drops an impact screen in seconds — when you’re done, it retracts and the car goes back in. Pair it with an optical launch monitor that stores on a shelf between sessions and you’ve solved the “I still need to park here” problem completely.
The SIG8 (8-foot wide enclosure) works in tighter bays where a full 10-foot enclosure won’t fit. It accepts a standard 4:3 or 16:9 impact screen, produces acceptable lateral padding, and keeps the cost under $1,000. It’s a compromise on immersion but not on function.
The DIY Budget Build: Under $3,000
Here’s the honest truth about budget simulator builds: the cutting corners are never where YouTube videos tell you they are. Here’s where to spend and where to save:
The Launch Monitor: Don’t Cheap Out Here
The Garmin R10 on sale (frequently available in practice bundles for $450–$499) is the best budget launch monitor for outdoor and range use. For indoor builds on a strict budget, the SC4 at $699 with no subscription edges it out on total cost of ownership. Either way — pick one and don’t look back. The $200 you save going to a no-name unit will cost you in bad data for years.
The Enclosure: Carl’s Place DIY Is Legitimate
Carl’s Place sells DIY enclosure kits in multiple sizes — the frame is PVC, the netting is quality, and the screens are better than anything you’ll find at a similar price from a golf-specific brand. A Carl’s Place 10×10 kit with a quality impact screen runs $600–$800 total. It won’t look as premium as a SIG enclosure but it will function identically.
The Mat: The Injury Trap Nobody Warns You About
The Mat: The Injury Trap Nobody Warns You About
Cheap hitting mats are the most dangerous component in a budget build. A mat that sits too high or too low changes your divot depth perception and can cause wrist, elbow, and shoulder injuries over months of indoor practice. The correct approach on a budget: buy a standard 4×6 HVAC mat (the rubber-backed foam type used in commercial buildings), cover it with outdoor artificial turf from a home improvement store, and insert a single high-quality hitting strip — the 12-inch replaceable strip that sits at the ball position. The hitting strip ($50–$80 for a quality one) is the only part of the mat your club actually contacts. This setup costs under $150 total and plays like a $400 commercial mat.
The noise problem: Impact screens vary enormously in sound. Cheap screens sound like a gunshot on every driver. This matters significantly if you’re in a garage next to a bedroom or in an apartment building. Look for screens marketed specifically as “noise-reducing” or “sound-dampening” — they cost $100–$200 more than standard screens and are worth every dollar. Alternatively, a double-layer screen setup (two impact screens with a small air gap) cuts impact noise by 30–40%.
DIY Budget Build — Under $3,000
LAUNCH MONITOR
Garmin R10
Practice Bundle
$499
No sub for basic data
Outdoor + range use
Alt: SC4 ($699)
for indoor accuracy
+
ENCLOSURE
Carl’s Place
10×10 DIY Kit
$700
PVC frame + netting
Quality impact screen
Add noise-reducing
screen +$150
+
PROJECTOR + SOFTWARE
BenQ + GSPro
Short-throw + PC
$1,200
BenQ TH671ST: $700
GSPro yr 1: $250
Budget PC: $250+
Use existing PC
to save $250
Total: ~$2,400 — add mat hack ($150) and you’re fully set up under $2,600
The Hidden Costs Warning: What the Spec Sheet Doesn’t Tell You
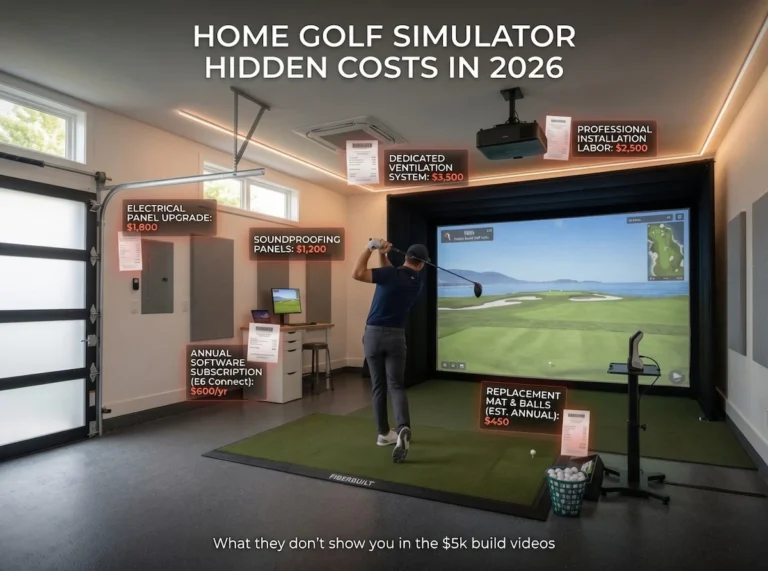
The simulator market has a hidden cost problem. Here’s everything that typically doesn’t appear in the headline price:
Software Subscriptions
GSPro is the gold standard simulation platform — the best course library, the best graphics, the best feel. It costs $249/year and requires a Windows PC. If you’re buying a launch monitor that doesn’t integrate with GSPro, you’re either limiting yourself to inferior software or you’re paying twice (once for the device’s native sim platform, once for GSPro). Our simulator software guide breaks down every platform and which devices connect to what.
Beyond GSPro, the device subscriptions add up fast. SkyTrak’s full-access plan is $299/year. Rapsodo Premium is $199/year. Garmin’s Home Tee Hero upgrade adds another tier. The only major accurate launch monitors with zero mandatory subscription in 2026 are Square Golf, the SC4, and overhead commercial units where the software is bundled.
The Gaming PC Requirement
GSPro runs on Windows only and requires a dedicated PC with a discrete GPU. Your MacBook doesn’t work. Your 5-year-old office desktop probably doesn’t work. A capable simulator PC — enough GPU to run 4K course graphics at 60fps — costs $600–$900 for a purpose-built unit or $300–$400 if you buy used and upgrade the GPU. This cost never appears in launch monitor marketing. It’s real and it matters.
The Projector Calculation
Short-throw projectors are not optional for most enclosure setups — a standard throw projector sits too far from the screen to work inside the footprint of a 10-foot enclosure. The BenQ TH671ST at ~$700 is the most-recommended budget short-throw for simulator use: 1080p, bright enough at simulator distances, good contrast. For 4K, the BenQ TK700STi adds HDR and native 4K for ~$1,100. Neither appears in any launch monitor’s “what’s in the box.”
True Total Cost of Ownership — A Realistic 3-Year View
The table below summarizes the three-year picture. For the full breakdown — including maintenance, replacement parts, and how each launch monitor’s subscription tiers compare — see our dedicated 3-year cost of ownership analysis.
3-Year Total Cost of Ownership
SETUP TYPE
HARDWARE
3-YR SUBSCRIPTIONS
3-YR TOTAL
DIY Budget (R10 + Carl’s + GSPro)~$2,400$750 (GSPro)~$3,150
Square Golf + SIG10 + BenQ + GSPro~$3,200$750 (GSPro)~$3,950
SkyTrak+ + SIG10 + BenQ + GSPro~$4,200$1,647 (ST+ + GSPro)~$5,847
R50 Studio (SIG10 + BenQ)~$5,800$0 (built-in sim)~$5,800
EYE XO2 Overhead Studio~$12,000$750 (GSPro)~$12,750
xsgolf.com
Frequently Asked Questions
How much space do I actually need for a home golf simulator?
Ceiling height is the hard limit: 10 ft minimum for a comfortable driver swing, and taller players need more. Depth then decides the technology. Radar units (Garmin R10 and R50, FlightScope Mevo+, Swing Caddie SC4) sit behind the ball and want roughly 16 ft of total depth; if your room is 14 ft or deeper you can run radar without compromise. Optical and camera systems (Square Golf, SkyTrak+, Foresight GC3) sit beside the ball and work in 8–10 ft, which makes them the correct choice at 10–13 ft.
What is the real 3-year cost of a home golf simulator?
Hardware is only part of it. DIY budget build (Garmin R10 + Carl’s Place + GSPro): about $2,400 hardware plus $750 of GSPro, so roughly $3,150. Square Golf + SIG10 + BenQ + GSPro: about $3,950. SkyTrak+ in the same build: about $5,847, because the subscription stacks on top of GSPro. Garmin R50 studio: about $5,800 with no simulator subscription. Overhead EYE XO2 studio: $8,000–$15,000. Subscriptions are what turn a cheap system into an expensive one — price three years, not the sticker. Our full 3-year cost of ownership breakdown shows every line item.
Do I need a special computer and software?
Most setups run GSPro ($249/year) on a mid-range Windows gaming PC, so budget the PC alongside the launch monitor rather than treating it as an extra. The Garmin R50 is the main exception — it runs courses on its built-in screen without a PC for many users. Our simulator software comparison covers what each platform actually costs.
Can I use the same setup for family entertainment or a home theater?
Yes, and many owners plan for it from the start by choosing a projector and screen that work for both jobs. The enclosure becomes a media room when nobody is hitting balls. Our dual-use simulator and home theater guide covers the throw-distance, brightness and screen trade-offs.
The Bottom Line: Match Setup to Situation
There is no universal “best” home golf simulator. There’s only the right setup for your room, your budget, and how you intend to practice. The most common mistake is buying the wrong technology for the space and spending money on subscriptions that erode the value of the hardware over time.
If you take one thing from this guide: measure the room first, choose the launch monitor technology second. Everything else follows from those two decisions. And if you want to go deeper on any component — the build guide covers room setup in detail, the software guide covers GSPro and every alternative, and our launch monitor guide breaks down the full under-$1,000 tier including the Garmin R10 and SC4 in head-to-head comparison.